Dental Handpiece Turbine Replacement
Dental Handpiece Turbines Repair
The process of dental drill repair is a vital service carried out by professionals within the dental industry to ensure the functionality and longevity of dental drills. These drills are indispensable tools used by dentists and dental hygienists for various dental procedures, including drilling and shaping teeth. The repair process entails a comprehensive diagnosis and troubleshooting of issues with the drill, followed by the replacement or repair of faulty components.
Highly skilled technicians specializing in dental drill repair possess an in-depth understanding of the intricate inner workings of this essential equipment. They are proficient at disassembling the drill, meticulously identifying damaged components, and making expert decisions on whether to repair them or replace them with new parts. Once the necessary repairs are completed, the dental drill undergoes rigorous testing to guarantee optimal performance and consistent reliability.
The services offered in dental drill repair are a linchpin for dental professionals, allowing them to maintain the efficiency of their equipment. This ensures that they can continue delivering top-notch dental care to their patients.
Dental High-Speed Handpiece Repair
High-speed handpiece repair is a specialized service provided by professionals in the dental industry. This process involves fixing and restoring high-speed handpieces, which are crucial tools used by dentists during various dental procedures. The repair of these handpieces requires skilled technicians who are knowledgeable in identifying and addressing the issues affecting the tool’s functionality. It is essential to entrust high-speed handpiece repair to experts who possess the necessary expertise and experience in handling such intricate equipment. These professionals utilize their technical know-how to diagnose problems accurately, disassemble the handpiece, replace faulty components, and reassemble it to restore its optimal performance. The goal of high-speed handpiece repair is to ensure that dentists have reliable and efficient tools to deliver quality dental care to their patients.
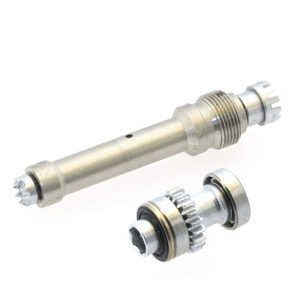
How To Change Dental Handpiece Turbine
In the field of dentistry, dental professionals need to possess the knowledge and skills required to effectively maintain and repair dental handpiece turbines. A dental handpiece turbine is a crucial component of a dental drill that plays a significant role in facilitating various dental procedures. To adequately maintain this essential tool, it is necessary to understand how to change the dental handpiece turbine. Firstly, ensure that the handpiece is properly sterilized and disconnected from any power source. Then, carefully remove the head cap by unscrewing it counterclockwise. Once the head cap is removed, the old turbine can be accessed. To replace it, align the new turbine with the handpiece shaft, making sure the grooves align properly. Firmly push the new turbine into place until it is securely in position. Finally, reattach the head cap by screwing it back on clockwise. It is imperative to follow the specific instructions provided by the handpiece manufacturer to ensure a successful installation. By acquiring the knowledge of how to change the dental handpiece turbine, dental professionals can effectively maintain their equipment and provide efficient oral care to their patients.
IMPORTANT – READ BEFORE CONTINUED
This is a general user guide and the principle of repairing dental turbines from various brands, including W&H, KaVo, Sirona, and NSK.
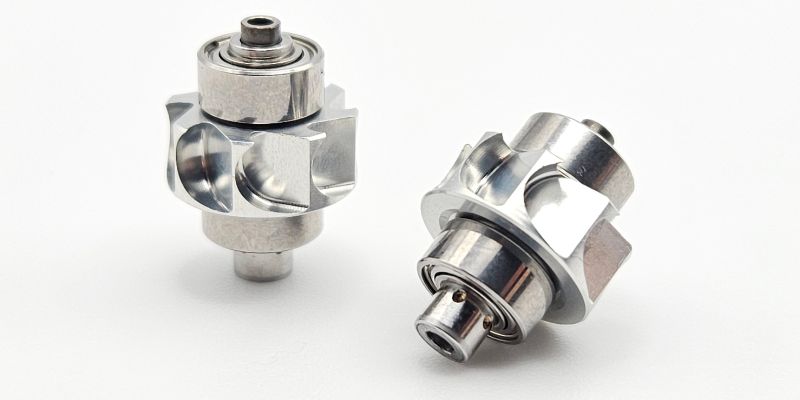
Dental Handpiece Inspection
Before attempting to repair a dental handpiece or replace a dental turbine (also known as a dental rotor), it is crucial to carefully inspect the handpiece head for any dents. Dental handpiece dents are typically caused by accidental drops and can be addressed by either specialized repair shops or by utilizing a handy tool called a “head expander.”
You might wonder why it’s advisable to engage specialized handpiece repair shops. The answer lies in the fact that these repairs often require special tools and the expertise that comes from working on numerous dental instruments. If any dents are evident on the head of your dental handpiece, it’s recommended to send it to a dental engineer or a dental shop for professional repair. This is more cost-effective than attempting the repair yourself, especially if you lack experience.
It’s worth noting that dropping a handpiece can also potentially damage other delicate internal components, such as fiber optics. (P.S. You can explore our range of fiber optics for dental turbines and contra-angles on our website.)
VERY IMPORTANT: If your dental handpiece exhibits external damage, it is crucial not to install a new dental turbine rotor. Doing so in a damaged head will permanently harm the dental high-speed handpiece. Alternatively, you can purchase a dental turbine head reamer/reamer from Dental Rotors to address dents on your own, but it’s essential to emphasize that specialized skills are required for this procedure.
REMOVAL of Damaged Dental Handpiece Parts:
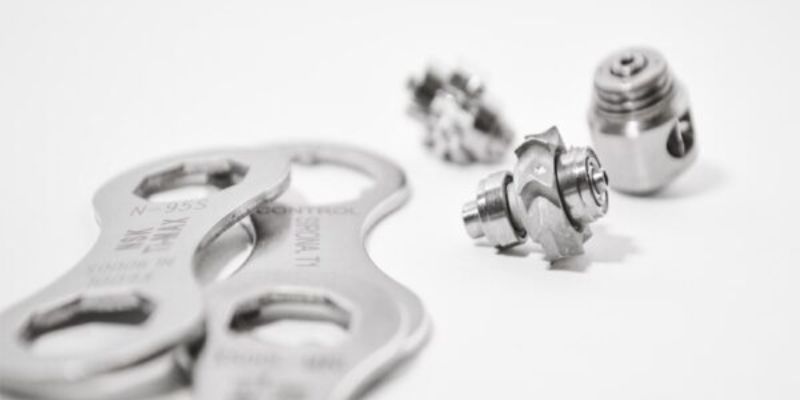
Each dental handpiece has its unique head design and size, and the components also vary from model to model and among manufacturers. Some parts, like button keys (also known as back caps), may be compatible between models, especially those with the same size and design with the same number of pins. However, it’s crucial to note that you cannot use the same service button for KaVo turbines with NSK turbines because they are fundamentally different.
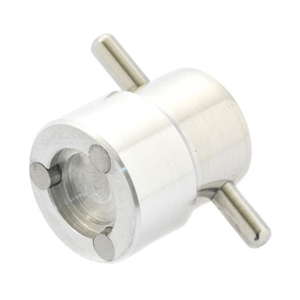
- Using a specialized dental back cap/button wrench, carefully unscrew the back tooth cap from the handpiece head. Then, remove the worn dental turbine by gently pushing it out from the front. Always use the appropriate tool for removing the end cap. Using pliers or improper tools may result in further damage to the dental handpiece.
- WARNING: It is essential to inspect the inside of the head for the presence of any foreign objects or debris. If any are found, remove them. Additionally, compare a worn dental rotor to a new dental turbine to determine which components may still be present in your handpiece. Utilize a scaler or probe to remove any old dental turbine components, including gaskets, o-rings, washers, or bearing holders. After removing these components, use a cotton swab and dental handpiece lubricant to clean the head of the dental handpiece. Using air from an air/water syringe, thoroughly purge the head of the handpiece to eliminate all remaining cotton fibers.
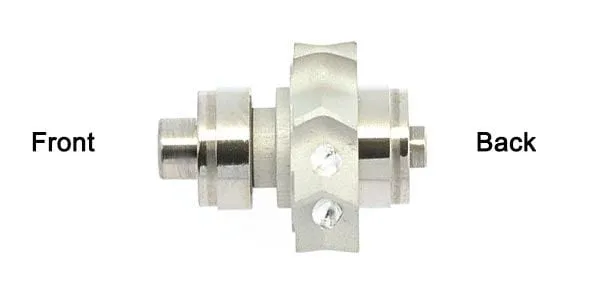
Assembling the Turbine Rotor:
Our Dental Cartridges Rotor Repair Kits are assembled with German ceramic bearings and come complete with o-rings and metal washers if the dental turbine is designed to be used with metal washers.
- Dental turbines/cartridges are often used by dentists, and they come equipped with two o-rings that must be replaced by the existing turbine o-rings. Over time, o-rings can degrade due to autoclaving and wear and tear. One o-ring fits into the groove on the front of the handpiece (bur end), and the other must fit into the groove on the back end of the dental cap. You may need to use a scaler or explorer to remove old o-rings from your dental high-speed tip and end cap. A polishing machine or a similar blunt tool can be helpful when installing new o-rings to ensure they are fully seated.
Special attention should be given to the o-rings to ensure that the old ones are completely removed and that the new ones are not misaligned, twisted, or otherwise improperly positioned.
- Generously lubricate the inside of the dental handpiece, paying particular attention to the o-rings. While holding the dental handpiece face down, fully insert the dental turbine into the head of the dental handpiece. Each dental rotor bearing has a small lip that rests against the o-rings. Screw the end cap into the handpiece head using the appropriate tool. WARNING: The end cap must be securely tightened using the special wrench to ensure the safe positioning of the dental high-speed turbine (dental turbine). If you encounter difficulties in fully installing the end cap, remove and inspect it for debris or old turbine components. If the problem persists, it’s advisable to send the replacement dental rotor and handpiece to a repair shop for installation.
The handling of various dental instruments demands a great deal of expertise, and the same applies to the repair of these complex instruments. However, in some situations, such as damage to handpiece turbines, you can successfully handle the repair yourself. Here, we have gathered valuable tips and nuances regarding dental handpiece repairs that can be highly useful. For more expert knowledge, please refer to our complete step-by-step guide on the inspection, removal, and installation of your dental handpiece turbine.
So, what is crucial to remember about dental handpiece repairs? First and foremost, always conduct a careful inspection of your instrument before use. Dents in handpiece turbines can lead to essential operating defects, and such damage is typically best repaired by specialized dental equipment repair shops. However, if you feel confident, you can attempt to fix the dental handpiece turbine on your own. All you need to do is follow the instructions described above and use the special tools available on our website. Most importantly, before you place an order, ensure that you have selected the exact model for your handpiece.
VIDEO and detailed user guide How to Repair Bien Air Turbines
How to repair a dental handpiece: We also offer a comprehensive video user guide for disassembling and assembling the dental high-speed handpiece. Sign up to get Video for Dental High-Speed Turbine
High-Speed Handpiece Repair:
If you find yourself in need of repairing your high-speed handpiece, you’ve come to the right place