


How to Replace a KaVo Rotor Cartridge
How to Replace a KaVo Rotor Cartridge (Step-by-Step Guide)
Replacing the rotor cartridge in a KaVo turbine handpiece is one of the most common repair tasks for dental technicians and clinics. A worn or damaged rotor can cause noise, vibration, heat, and reduced cutting performance. This guide walks you through the process step-by-step to ensure a safe and effective repair.
What You’ll Need
✔ Premium KaVo rotor cartridge (correct model)
✔ Handpiece repair tools set (wrenches, pliers, torque drivers)
✔ Cleaning brushes & lubricant/grease
✔ Safety gloves and eyewear
✔ Soft work mat or parts tray
Tip: Always choose purpose-built replacement rotors made in Europe for better balance and durability.
Step-by-Step Guide to Replace KaVo Rotor Cartridge
Step 1 — Identify Your Handpiece Model
Every KaVo handpiece (e.g., KaVo 640B, 635, 642) has a model code printed on the body.
Match this code to the correct rotor cartridge SKU on the product page.
Example:
If you have KaVo 640B → use the KaVo 640B Rotor Cartridge.
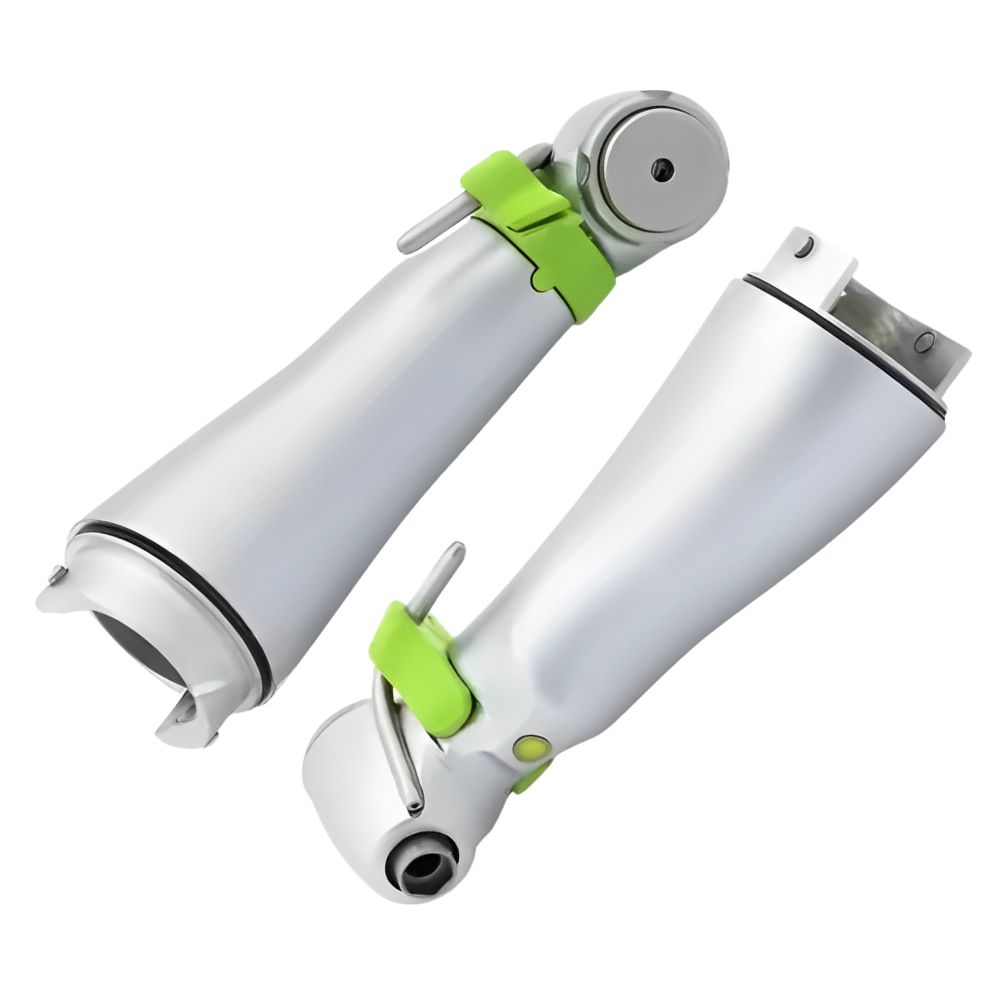
Step 2 — Disassemble the Handpiece
-
Grip the handpiece in a soft-jaw vise.
-
Remove the front cap by rotating counter-clockwise.
-
Gently pull the old rotor cartridge out with specialized pliers.
⚠️ Avoid twisting or forcing — this can damage bearing seats.
Step 3 — Inspect the Bearings and O-Rings
Before installing a new rotor:
-
Check the bearing surfaces for wear or pitting
-
Clean housing with a lint-free brush
-
Replace O-rings if brittle or worn
A smooth internal surface ensures longer rotor life.
Step 4 — Install the New Rotor Cartridge
-
Apply a thin lubricant to the rotor shaft and bearings.
-
Gently insert the rotor into the handpiece body.
-
Ensure the rotor seats fully without resistance.
Note: The rotor must spin freely — no binding or grinding.
Step 5 — Reassemble and Test
-
Replace the handpiece cap and tighten securely.
-
Test rotation with foot control at low speed.
-
Listen for noise and feel for vibration.
✅ A correctly installed rotor should run smoothly and quietly.
Common Problems & Solutions
| Problem | Cause | Fix |
|---|---|---|
| Excessive noise | Worn bearings | Replace bearings + rotor |
| Vibration | Improper seating | Re-install rotor with lubrication |
| Heat build-up | Poor airflow | Clean air channels |
Benefits of Premium European KaVo Rotors
-
Improved balance and performance
-
Longer service life vs low-quality imports
-
Reduced risk of premature failure
-
Precision-built for KaVo turbine tolerances
See also:
FAQ — KaVo Rotor Replacement
1. How often should I replace a KaVo rotor?
Typical lifespan is 6–12 months depending on use and sterilization cycles.
2. Can I replace the KaVo rotor myself?
Yes — this tutorial is designed for technician-level repairs. If unsure, consult a trained repair specialist.
3. Are aftermarket rotors as good as OEM?
Premium aftermarket rotors (European-made) often match OEM performance and come at a lower cost.
4. What tools do I need for this repair?
A basic handpiece repair toolkit with pliers, wrenches, and a soft work surface.
5. What causes rotor failure?
Common causes include bearing wear, debris contamination, and improper lubrication.